Your cart is currently empty!
Tag: Installer Code
-
How to Reboot (Reset) My Alarm System Panel
[row label=”Intro”] [col span=”4″ span__sm=”12″] [ux_image id=”64156″] [/col] [col span=”8″ span__sm=”12″]
Rebooting Your Alarm Panel
Sometimes your alarm will need to be rebooted or reset which is simply powering down the alarm completely then restarting. This should not be confused with “Defaulting The System” which would erase all existing panel configurations of zones, passcodes, essentially wiping the panel clean to factory settings.
When is a reboot necessary:
- Alarm is unresponsive
- You are adding new hardware which always requires a powerdown to safely move wiring
- Communicator has lost contact with the app service such as AlarmNet, Alarm.com
- When instructed by your alarm dealer troubleshooting a system problem remotely
Keep in mind an alarm is just a small dedicated computer system that at times may need to be rebooted due to a power surge or other external influences. While the need to reset your system is rare (many systems run for a decade or more without a reboot) it can come up.
We list below simple reboot instructions for the major alarm panels on the market today.
[/col] [/row] [divider width=”1000px”] [row label=”Honeywell Vista”] [col span=”4″ span__sm=”12″ align=”center”] [ux_image id=”32506″] [ux_image id=”69131″ width=”58″] [ux_image id=”34856″ width=”37″] [/col] [col span=”8″ span__sm=”12″]Honeywell Vista 10P, 15P, 20P, 21iP, SafeWatch Pro 3000 Hardwired Panels
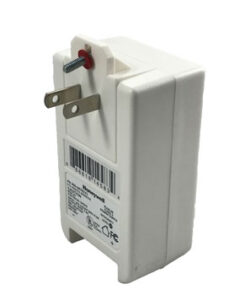
For hardwired security systems there will be a metal enclosure located somewhere out of sight such as in the basement, closet, garage, but always in a protected space. Alarm panels are low-voltage devices and use plug-in transformers rather than direct 120VAC wiring. The transformer will be close to this panel enclosure and usually screwed to the outlet cover plate so no one unplugs the transformer accidentally disabling the alarm. The system’s backup battery is inside this enclosure and can easily be disconnected which will be needed to reset the Installer Code. All configuration/programming is stored on nonvolatile memory so there is no danger of losing anything when power is lost. Here are the steps:
-
- Unplug the 16.5VAC transformer from the 120VAC unswitched wall outlet. If you can’t seem to locate this transformer you could also carefully remove the wire from Terminal 1 on a Vista panel. Be careful to not short out the transformer by touching the metal enclosure or any other screw terminal.
- Unplug the backup battery located in the metal enclosure. Just slide either the Red or Black wire off of the clip on the battery. There is no need to disconnect both the Black and Red, just one.
- Ensure the system keypad is dark (no power)
- Wait ten seconds then plug the battery back in.
- Plug the transformer back in or reattached the wire to Terminal 1.
- Check system keypad to see that the system is booting back up. It may take a minute or so to return to its normal display.
[/col] [/row] [divider width=”1000px”] [row label=”Honeywell LynxTouch”] [col span=”4″ span__sm=”12″ align=”center”] [ux_image id=”69133″] [ux_image id=”242208″ width=”48″] [/col] [col span=”8″ span__sm=”12″]
Honeywell LynxTouch L5210, L7000
Follow these steps to reset your Honeywell LynxTouch wireless security system. The LynxTouch is an “all-in-one” wireless alarm system meaning the keypad, control panel, wireless transceiver, siren, backup battery are all contained in one housing.
Soft Reboot
- From your keypad press Security, More, Tools, then enter your Master Code. This is generally the code you arm and disarm with.
- Select Test, Reboot, then YES. The system will begin its reboot process which can take a few minutes to complete.
If the Soft Reboot does not help then a Hard Reboot by removing power may be necessary.
Hard Reboot
- Unplug the low voltage transformer from the nearby 120VAC outlet. If unsure where the transformer is located open the front of the LynxTouch and disconnect one of the wires connecting the transformer to the L7000 or L5210 motherboard.
- Unhook the front face of the LynxTouch by depressing the two clips at the top of the keypad. The L7000/L5210 will start beeping when the face plate is unclipped (tamper alarm). Just hit the green HOME button to silence.
- Wait 60 seconds then disconnect the backup battery battery from inside the LynxTouch by unhooking the white plug on battery.
- Wait ten seconds then plug battery back in and reconnect transformer wire to panel or plug the transformer back into the 120VAC wall outlet.
Honeywell Lyric Controller
Follow these steps to reset your Honeywell Lyric wireless security system. The Lyric is an “all-in-one” wireless alarm system meaning the keypad, control panel, wireless transceiver, siren, backup battery are all contained in one housing.
- Unplug the low voltage transformer from the nearby 120VAC outlet. If unsure where the transformer is located open the front of the Lyric and disconnect one of the wires connecting the transformer to the panel’s motherboard.
- Unhook the front face of the Lyric by loosening the screw at the center bottom of the keypad and sliding the Lyric UP from its wall mounting plate. The Lyric will start beeping when the face plate is opened (tamper alarm). Just hit the HOME button to silence.
- Wait 60 seconds then disconnect the backup battery battery from inside the Lyric by unhooking the white plug on battery.
- Wait ten seconds then plug battery back in and reconnect transformer wire to panel or plug the transformer back into the 120VAC wall outlet.
There is also a Soft Reboot option as well.
- From your keypad press Security, Tools, then enter your Installer Code. 4112 is the default Installer Code unless changed by you or a dealer.
- Select Program. System Programming will display.
- Select Test then Diagnostics
- Select Reboot. Confirm you want to reboot by pressing YES
If the Soft Reboot does not help then a Hard Reboot by removing power may be necessary.
[/col] [/row] [divider width=”1000px”] [row label=”Honeywell ProA7Plus”] [col span=”4″ span__sm=”12″ align=”center”] [ux_image id=”102482″] [ux_image id=”242208″ width=”48″] [/col] [col span=”8″ span__sm=”12″]
Honeywell ProA7, ProA7Plus
Follow these steps to reset your Honeywell ProA7Plus wireless security system. This popular panel is an “all-in-one” wireless alarm system meaning the keypad, control panel, wireless transceiver, siren, backup battery are all contained in one housing.
- Unplug the low voltage transformer from the nearby 120VAC outlet. If unsure where the transformer is located open the front of the ProA7Plus and disconnect one of the wires connecting the transformer to the panel’s motherboard.
- Unhook the front face of the ProA7Plus by loosening the set screw at the center bottom of the keypad and sliding the panel UP from its wall mounting plate. The panel will start beeping when the face plate is opened (tamper alarm). Just hit the HOME button to silence.
- Wait 60 seconds then disconnect the backup battery battery from inside the ProA7Plus by unhooking the plug on the battery from the panel’s motherboard.
- Wait ten seconds then plug battery back in and reconnect transformer wire to panel or plug the transformer back into the 120VAC wall outlet.
There is also a Soft Reboot option as well.
- Select Menu (three horizontal lines) at the bottom center of screen
- Press Tools, then enter Master Code
- Press Reboot System to power cycle the ProA7Plus.
If the Soft Reboot does not help then a Hard Reboot by removing power may be necessary.
DSC PowerSeries PC1616, PC1832, PC1864, HS2016, HS2032, HS2064
For hardwired DSC security systems there will be a metal enclosure located somewhere out of sight such as in the basement, closet, garage, but always in a protected space. Alarm panels are low-voltage devices and use plug-in transformers rather than direct 120VAC wiring. The transformer will be close to this panel enclosure and usually screwed to the outlet cover plate so no one unplugs the transformer accidentally disabling the alarm. The system’s backup battery is inside this enclosure and can easily be disconnected which will be needed to reset the Installer Code. All configuration/programming is stored on nonvolatile memory so there is no danger of losing anything when power is lost. Here are the steps:
-
- Unplug the 16.5VAC transformer from the 120VAC unswitched wall outlet. If you can’t seem to locate this transformer you could also carefully remove the wire from AC (either one). Be careful to not short out the transformer by touching the metal enclosure or any other screw terminal.
- Unplug the backup battery located in the metal enclosure. Just slide either the Red or Black wire off of the clip on the battery. There is no need to disconnect both the Black and Red, just one.
- Ensure the system keypad is dark (no power)
- Wait ten seconds then plug the battery back in.
- Plug the transformer back in or reattached the wire to AC.
- Check system keypad to see that the system is booting back up. It may take a minute or so to return to its normal display.
Interlogix/GE NetworX NX-4V2, NX-6V2, NX-8V2, NX-8E
For hardwired Interlogix (GE) security systems there will be a metal enclosure located somewhere out of sight such as in the basement, closet, garage, but always in a protected space. Alarm panels are low-voltage devices and use plug-in transformers rather than direct 120VAC wiring. The transformer will be close to this panel enclosure and usually screwed to the outlet cover plate so no one unplugs the transformer accidentally disabling the alarm. The system’s backup battery is inside this enclosure and can easily be disconnected which will be needed to reset the Installer Code. All configuration/programming is stored on nonvolatile memory so there is no danger of losing anything when power is lost. Here are the steps:
-
- Unplug the 16.5VAC transformer from the 120VAC unswitched wall outlet. If you can’t seem to locate this transformer you could also carefully remove the wire from AC (either one). Be careful to not short out the transformer by touching the metal enclosure or any other screw terminal.
- Unplug the backup battery located in the metal enclosure. Just slide either the Red or Black wire off of the clip on the battery. There is no need to disconnect both the Black and Red, just one.
- Ensure the system keypad is dark (no power)
- Wait ten seconds then plug the battery back in.
- Plug the transformer back in or reattached the wire to AC.
- Check system keypad to see that the system is booting back up. It may take a minute or so to return to its normal display.
Interlogix/GE SimonXT
Follow these steps to reset your Interlogix SimonXT wireless security system. The SimonXT is an “all-in-one” wireless alarm system meaning the keypad, control panel, wireless transceiver, siren, backup battery are all contained in one housing.
- Unplug the low voltage transformer from the nearby 120VAC outlet. If unsure where the transformer is located open the front of the SimonXT and disconnect one of the wires connecting the transformer to the panel’s motherboard.
- Unhook the front face of the SimonXT by lifting the two tabs at the top of the keypad. The panel will start beeping when the face plate is unclipped (tamper alarm). Just hit any key to silence.
- Wait 60 seconds then disconnect the backup battery battery from inside the SimonXT by unhooking the plug on battery from the motherboard.
- Wait ten seconds then plug battery back in and reconnect transformer wire to panel or plug the transformer back into the 120VAC wall outlet.
Interlogix/GE SimonXTi
Follow these steps to reset your Interlogix SimonXT wireless security system. The SimonXTi is an “all-in-one” wireless alarm system meaning the keypad, control panel, wireless transceiver, siren, backup battery are all contained in one housing.
- Unplug the low voltage transformer from the nearby 120VAC outlet. If unsure where the transformer is located open the front of the SimonXT and disconnect one of the wires connecting the transformer to the panel’s motherboard.
- Unhook the front face of the SimonXTi by first removing the trim ring by lifting at the notch on the lower right side of the keypad.
- Next lift the two tabs at the top of the keypad. The panel will start beeping when the face plate is unclipped (tamper alarm). Just hit any key to silence.
- Wait 60 seconds then disconnect the backup battery battery from inside the SimonXT by unhooking the plug on battery from the motherboard.
- Wait ten seconds then plug battery back in and reconnect transformer wire to panel or plug the transformer back into the 120VAC wall outlet.
Interlogix/GE Concord 4
For hardwired security systems there will be a metal enclosure located somewhere out of sight such as in the basement, closet, garage, but always in a protected space. Alarm panels are low-voltage devices and use plug-in transformers rather than direct 120VAC wiring. The transformer will be close to this panel enclosure and usually screwed to the outlet cover plate so no one unplugs the transformer accidentally disabling the alarm. The system’s backup battery is inside this enclosure and can easily be disconnected which will be needed to reset the Installer Code. All configuration/programming is stored on nonvolatile memory so there is no danger of losing anything when power is lost. Here are the steps:
-
- Unplug the 16.5VAC transformer from the 120VAC unswitched wall outlet. If you can’t seem to locate this transformer you could also carefully remove the wire from Terminal 1 on the Concord 4 panel. Be careful to not short out the transformer by touching the metal enclosure or any other screw terminal.
- Unplug the backup battery located in the metal enclosure. Just slide either the Red or Black wire off of the clip on the battery. There is no need to disconnect both the Black and Red, just one.
- Ensure the system keypad is dark (no power)
- Wait ten seconds then plug the battery back in.
- Plug the transformer back in or reattached the wire to Terminal 1.
- Check system keypad to see that the system is booting back up. It may take a minute or so to return to its normal display.
Qolsys IQ 2, 2+, 4, IQ Hub
Follow these steps to reset your Qolsys wireless security system. This popular panel is an “all-in-one” wireless alarm system meaning the keypad, control panel, wireless transceiver, siren, backup battery are all contained in one housing.
- Unplug the low voltage transformer from the nearby 120VAC outlet. If unsure where the transformer is located open the front of the IQ Panel and disconnect one of the wires connecting the transformer to the panel’s motherboard.
- Unhook the front face of the IQ Panel by loosening the set screw at the center bottom of the keypad and pulling the panel AWAY from its wall mounting plate. The panel will start beeping when the face plate is opened (tamper alarm). Just hit the HOME button to silence.
- Wait 60 seconds then disconnect the backup battery battery from inside the IQ Panel by unhooking the plug on the battery from the panel’s motherboard.
- Wait ten seconds then plug battery back in and reconnect transformer wire to panel or plug the transformer back into the 120VAC wall outlet.
There is also a Soft Reboot option as well.
- Press the small gray bar above the Time on the Home screen
- Press Settings then Advanced Settings.
- Enter your Master Code (the code you arm and disarm with)
- Press Panel Reboot and select YES to reboot the IQ Panel
If the Soft Reboot does not help then a Hard Reboot by removing power may be necessary.
[/col] [/row] [divider width=”1000px”] [row label=”2GIG GC2″] [col span=”4″ span__sm=”12″] [ux_image id=”36751″] [ux_image id=”89403″] [/col] [col span=”8″ span__sm=”12″]2GIG GC2, GC2e, GC3, GC3e
Follow these steps to reset your 2GIG wireless security system. This popular panel is an “all-in-one” wireless alarm system meaning the keypad, control panel, wireless transceiver, siren, backup battery are all contained in one housing.
- Unplug the low voltage transformer from the nearby 120VAC outlet. If unsure where the transformer is located open the front of the 2GIG panel and carefully disconnect one of the wires connecting the transformer to the panel’s motherboard. Look for Terminal 1, 14VDC Power Input +.
- Unhook the front face of the 2GIG Panel by loosening the set screw at the center top of the keypad and pulling the panel AWAY from its wall mounting plate. The panel will start beeping when the face plate is opened (tamper alarm). Just hit the HOME button to silence.
- Wait 60 seconds then disconnect the backup battery battery from inside the 2GIG Panel by unhooking the plug on the battery from the panel’s motherboard.
- Wait ten seconds then plug battery back in and reconnect transformer wire to panel or plug the transformer back into the 120VAC wall outlet.
2GIG Edge
Follow these steps to reset your 2GIG Edge wireless security system. This popular panel is an “all-in-one” wireless alarm system meaning the keypad, control panel, wireless transceiver, siren, backup battery are all contained in one housing.
- Unplug the low voltage transformer from the nearby 120VAC outlet. If unsure where the transformer is located open the front of the 2GIG panel and carefully disconnect one of the wires connecting the transformer to the panel’s motherboard. Look for Terminal 9, DC IN +.
- Unhook the front face of the 2GIG Panel by loosening the set screw at the center bottom of the keypad and pulling the panel AWAY from its wall mounting plate. The panel will start beeping when the face plate is opened (tamper alarm). Just hit the HOME button to silence.
- Wait 60 seconds then disconnect the backup battery battery from inside the 2GIG Panel by unhooking the plug on the battery from the panel’s motherboard.
- Wait ten seconds then plug battery back in and reconnect transformer wire to panel or plug the transformer back into the 120VAC wall outlet.
There is also a Soft Reboot option as well.
- Tap the 2GIG Logo on the Home Screen followed by your Master Code (the code you arm and disarm with) when prompted
- Press System Info
- Press REBOOT followed by Master Code
If the Soft Reboot does not help then a Hard Reboot by removing power may be necessary.
[/col] [/row] -
How To Check If Your Alarm Installer Code Is Valid
[row label=”Intro”] [col span=”4″ span__sm=”12″] [ux_image id=”96714″] [ux_image id=”64156″] [/col] [col span=”8″ span__sm=”12″]
Installer Code
This special code is used to get into the programming section of your alarm system. It allows you to add or delete sensors and zones, change entry/exit delay times, and if using landline for monitoring allows you to change the phone numbers and account number for a central station. In almost all cases having a valid Installer Code will be required when switching alarm dealers.
In some systems such as Honeywell resetting the Installer Code is easy to do without modifying any of the other system configuration programming. But in others there is either no way to reset this important code or the entire system must be factory defaulted (erased) to reset the Installer Code back to its default. We always recommend leaving the system Installer Code at its default value. However many dealers will change the Installer Code to keep customers out of programming but more importantly because it locks you to that dealer for monitoring.
Below you will find instructions for how to test if your Installer Code is valid. If you don’t know what the Installer Code is set to you can start with the default Installer Code for this system which is also shown.
[/col] [/row] [row label=”Warning”] [col span__sm=”12″ padding=”15px 25px 10px 25px” bg_color=”#e46d09″ bg_radius=”29″ color=”light”]NOTE: While Vanguard Security Corporation makes every attempt to provide accurate information, because the end-user is trying these codes remotely and we can’t see what is actually being pressed on the keypad, please use these instructions at your own risk. It is very easy to make an inadvertent change to your panel’s programming if you don’t exit Program Mode properly. Consider contacting the last monitoring dealer or installer to get your panel’s Installer Code.
[/col] [/row] [divider width=”1000px”] [row label=”Honeywell Vista”] [col span=”4″ span__sm=”12″] [ux_image id=”32506″] [/col] [col span=”8″ span__sm=”12″]Honeywell Vista 10P, 15P, 20P, 21iP, SafeWatch Pro 3000 Hardwired Panels, as well as L3000 LynxPlus Wireless.
Default Installer Codes to try: 4112, 6321, 4140
To test if your Installer Code is valid
- From your keypad enter [Installer Code] + 800. 4112 is the default code.
- If correct “20” or “Installer Code” will display. If nothing then the code entered is incorrect and changed by a dealer.
- If correct enter *99 to exit Program Mode. Be careful to not make any inadvertant changes while in Program Mode.
To reset the Installer Code on a Vista or L3000 panel
- Use this link to Reset Your Vista Installer Code
Honeywell LynxTouch L5210, L7000
Default Installer Codes to try: 4112, 6321
To test if your Installer Code is valid
- From your keypad press Security, More, Tools, then enter your Installer Code above
- If correct Program will display as a menu item. If nothing then the code entered is incorrect and changed by a dealer.
- If correct press the Home button to exit Program Mode. Be careful to not make any inadvertant changes while in Program Mode.
To reset the Installer Code on a Vista panel
- Use this link to Reset your LynxTouch Installer Code
Honeywell Lyric Controller
Default Installer Codes to try: 4112, 6321
To test if your Installer Code is valid
- From your keypad press Security, Tools, then enter your Installer Code above
- If correct Program will display as a menu item. If nothing then the code entered is incorrect and changed by a dealer.
- If correct press the Home button to exit Program Mode. Be careful to not make any inadvertant changes while in Program Mode.
To reset the Installer Code on a Vista panel
- There is no reset for the Installer Code on a Lyric panel. You will need to get a valid code from the last dealer or replace the panel which may need the help of a local dealer to reprogram the new panel.
Honeywell ProA7, ProA7Plus
Default Installer Codes to try: 4112, 6321
To test if your Installer Code is valid
- From your keypad press the Menu button (three lines) at the center bottom of screen.
- Scroll down and select Tools
- Enter your Installer Code from above
- If correct Program will display as a menu item. If nothing then the code entered is incorrect and changed by a dealer.
- If correct press the Back Arrow button to exit Program Mode. Be careful to not make any inadvertant changes while in Program Mode.
To reset the Installer Code on a Vista panel
- There is no reset for the Installer Code on a ProA7 series panel. You will need to get a valid code from the last dealer or replace the panel which may need the help of a local dealer to reprogram the new panel.
DSC PowerSeries PC5010, PC1555, PC1616, PC1832, PC1864, HS2016, HS2032, HS2064
Default Installer Codes to try: 5555, 6321, 5010
To test if your Installer Code is valid
- From your keypad enter *8 [Installer Code]. The default Installer Code is 5555.
- If correct the red lock light will come on and the keypad will rapidily beep 5 times. If nothing or a long beep then the code entered is incorrect and changed by a dealer.
- If the code is correct press # to exit Program Mode. Be careful to not make any inadvertant changes while in Program Mode.
To reset the Installer Code
- The only way to change the Installer Code if unknown is to default the panel which erases all zone configuration. This should be handled by a local dealer since its pretty involved (and expensive) reprogramming the alarm panel.
Interlogix/GE NetworX NX-4V2, NX-6V2, NX-8V2, NX-8E
Default Installer Codes to try: 9713, 6321, 4321
To test if your Installer Code is valid
- From your keypad enter *8 [Installer Code]. Try each default Installer Code above.
- If correct the Service LED will flash and the five function LEDS will illuminate steady. If nothing or a long beep then the code entered is incorrect and changed by a dealer.
- If correct press EXIT to leave Program Mode. Be careful to not make any inadvertant changes while in Program Mode.
To reset the Installer Code
- There is no reset for the Installer Code on a NetworX panel. You will need to get a valid code from the last dealer or replace the panel which may need the help of a local dealer to reprogram the new panel.
[/col] [/row] [divider width=”1000px”] [row label=”Interlogix SimonXT”] [col span=”4″ span__sm=”12″] [ux_image id=”96879″] [/col] [col span=”8″ span__sm=”12″]
Interlogix/GE SimonXT
Default Installer Codes to try: 4321, 6321, 7913
To test if your Installer Code is valid
- From your keypad press the Up or Down arrow until you reach System Programming then press OK
- Try each default Installer Code above
- If correct Access Codes will display on the scroll down menu. If nothing or display returns to the Home screen then the code entered is incorrect and changed by a dealer.
- If correct press STATUS several times to leave Program Mode. Be careful to not make any inadvertant changes while in Program Mode.
To reset the Installer Code
- The only way to change the Installer Code if unknown is to default the panel which erases all zone configuration. This should be handled by a local dealer since its pretty involved (and expensive) reprogramming the alarm panel.
[/col] [/row] [divider width=”1000px”] [row label=”Interlogix Concord 4″] [col span=”4″ span__sm=”12″] [ux_image id=”158342″] [/col] [col span=”8″ span__sm=”12″]
Interlogix/GE Concord 4
Default Installer Codes to try: 4321, 6321, 7913
To test if your Installer Code is valid
- From your keypad enter 8 [Installer Code] + 00. Try each default Installer Code above.
- If correct the keypad will display System Programming If nothing or a long beep then the code entered is incorrect and changed by a dealer.
- If correct press the A or B keys until Exit Programming appears then press #. Be careful to not make any inadvertant changes while in Program Mode.
To reset the Installer Code
- There is no reset for the Installer Code on a Concord 4 panel. You will need to get a valid code from the last dealer or replace the panel which may need the help of a local dealer to reprogram the new panel.
[/col] [/row] [divider width=”1000px”] [row label=”Qolsys”] [col span=”4″ span__sm=”12″] [ux_image id=”96660″] [/col] [col span=”8″ span__sm=”12″]
Qolsys IQ 2, 2+, 4, Hub
Default Installer Codes to try: 1111, 2222, 6321
To test if your Installer Code is valid
-
Start from the home screen of the IQ Panel.
-
Press the small grey bar at the top or swipe down on the display.
-
Select Settings then Advanced Settings
-
Enter your Installer Code using codes above
-
If Installation appears as a menu item (top left) then the Installer Code is valid.
- To exit Programming press the Home button. Be careful to not make any inadvertant changes while in Program Mode.
To reset the Installer Code
- There is no reset for the Installer Code on a Qolsys panel. In most cases we can reset the Installer Code back to 1111 remotely once we register your Qolsys panel with Alarm.com.
[/col] [/row] [divider width=”1000px”] [row label=”2GIG GC2″] [col span=”4″ span__sm=”12″] [ux_image id=”36751″] [/col] [col span=”8″ span__sm=”12″]
2GIG GC2, GC2e
Default Installer Codes to try: 1561, 6321
To test if your Installer Code is valid
-
Start from the Home screen of the GC2
-
Press Security, Menu, Toolbox
- Press the Right Arrow key and select Installer Toolbox
- Enter your Installer Code using codes above
-
If System Configuration appears as a menu item then the Installer Code is valid.
- To exit Programming press End then Exit. Be careful to not make any inadvertant changes while in Program Mode.
To reset the Installer Code
- In most cases however we can reset the Installer Code back to 1561 remotely once we register your 2GIG panel with Alarm.com.
- The other option is to default (reset) your 2GIG panel back to factory settings. This can be expensive and/or time consuming reprogramming the system from scratch.
[/col] [/row] [divider width=”1000px”] [row label=”2GIG GC3″] [col span=”4″ span__sm=”12″] [ux_image id=”89403″] [/col] [col span=”8″ span__sm=”12″]
2GIG GC3, GC3e
Default Installer Codes to try: 1561, 6321
To test if your Installer Code is valid
-
Start from the Home screen of the GC3
-
Press System Settings
- Enter your Installer Code using codes above
- Press Installer Toolbox
-
If System Configuration appears as a menu item then the Installer Code is valid.
- To exit Programming press End then Exit. Be careful to not make any inadvertant changes while in Program Mode.
To reset the Installer Code
- In most cases we can reset the Installer Code back to 1561 remotely once we register your 2GIG panel with Alarm.com.
- The other option is to default (reset) your 2GIG panel back to factory settings. This can be expensive and/or time consuming reprogramming the system from scratch.
[/col] [/row] [divider width=”1000px”] [row label=”2GIG Edge”] [col span=”4″ span__sm=”12″] [ux_image id=”102258″] [/col] [col span=”8″ span__sm=”12″]
2GIG Edge
Default Installer Codes to try: 1561, 6321
To test if your Installer Code is valid
-
Start from the Home screen of the Edge panel
-
Press the Gear icon on the bottom right corner of the screen
- Enter your Installer Code using codes above
- Scroll to the bottom and select Installer Toolbox
-
If Panel Programming appears as a menu item then the Installer Code is valid.
- To exit Programming press the Back button until you get back to the HOME screen. Be careful to not make any inadvertant changes while in Program Mode.
To reset the Installer Code
- In most cases we can reset the Installer Code back to 1561 remotely once we register your 2GIG panel with Alarm.com
[/col] [/row]