


How To Configure My Alarm Panel For WIFI
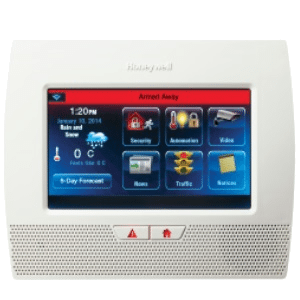
Honeywell Lyric Controller (LCP500-L)
- From the Home screen, press Security
- Press Tools
- Enter your Master Code
- Press WIFI Config
- Press Scan Access Points
- When your network appears select it then press Edit
- Press Key and enter your WIFI password (case sensitive)
- Press Save
- Press Join. WIFI icon should no longer have ! in it
- Press Home to exit

Honeywell Lynx Touch L7000
- From the Home screen, press Security
- Select More
- Press Tools
- Enter your Master Code
- Press WIFI Config
- Press Scan Access Points then Scan
- When your network appears select it then press Edit
- Press Key and enter your WIFI password (case sensitive)
- Press Done
- Press Join
- When “Device has been successfully added to the network” press OK
- Press Home to exit
Honeywell Lynx Touch L5210
- From the Home screen, press Security
- Select More
- Press Tools
- Enter your Master Code
- Press WIFI Config
- Press Scan Access Points then Scan
- When your network appears select it then press Edit
- Press Key and enter your WIFI password (case sensitive)
- Press Done
- Press Join
- When “Device has been successfully added to the network” press OK
- Press Home to exit

Honeywell ProA7Plus
- Press the Menu icon (bottom center)
- Scroll to Settings
- Press WIFI
- Enter your Master Code or Installer Code (default Installer Code is 4112)
- Press WIFI Networks
- When your network appears select it
- Press Key and enter your WIFI password (case sensitive)
- Press Save
- Press Connect (upper right)
- Press Shield icon to exit

Qolsys IQ Panel 2, 2+, 4
- From the Home screen swipe down (or hit small grey bar at top of the screen)
- Select Settings
- Select Advanced Settings
- Enter your Master Code
- Press WI-FI
- Press Scan Access Points then Scan
- When your network appears select it then enter your WIFI password (case sensitive)
- Press Connect
- Press Home to exit

2GIG Edge
- Press the Settings icon (gear) bottom right corner
- Enter your Master Code or Installer Code (default Installer Code is 1561)
- Press Network
- Press Wireless
- Scroll through the list of available networks and choose your network (SSID)
- Enter WIFI key/passcode (case sensitive)
- Press blue Next button and enter key/passcode again to confirm
- Press picture of house (bottom right corner) to exit to Home screen
Alula Connect+ (Helix)
- Press and hold the Enroll/WPS button on the Connect+ until it beeps twice (roughly 10 seconds)
- Press the WPS button on your router to join

